How to Use a Grid Dipper
|
|
Grid dip meters, aka grid dip oscillators (GDO in this 1956 Popular Electronics magazine article), are extremely useful for determining when a circuit is functioning at resonance. In the words of Sherlock Holmes, "It is simplicity in itself" the way a GDO operates. The grid dip oscillator emits power at a calibrated frequency which is absorbed (or not) to a degree depending on how close to resonance the external circuit under test is to that frequency. The nice thing about this type of instrument is that it does not need a wired or other type of physical connection to the circuit. Of course modern day GDOs do not use vacuum tubes with grids that register relative current levels as an indication of resonance, but the nomenclature has persisted. Besides, there are still many classic grid dip meters both in use and available for purchase at Ham swap meets and on venues like eBay. In fact, the exact Heathkit model GD-1A featured here is currently listed. How to Use a Grid Dipper By B. Van Sutphin
With a grid-dip oscillator, you can check circuits, frequency, and realign your receiver.
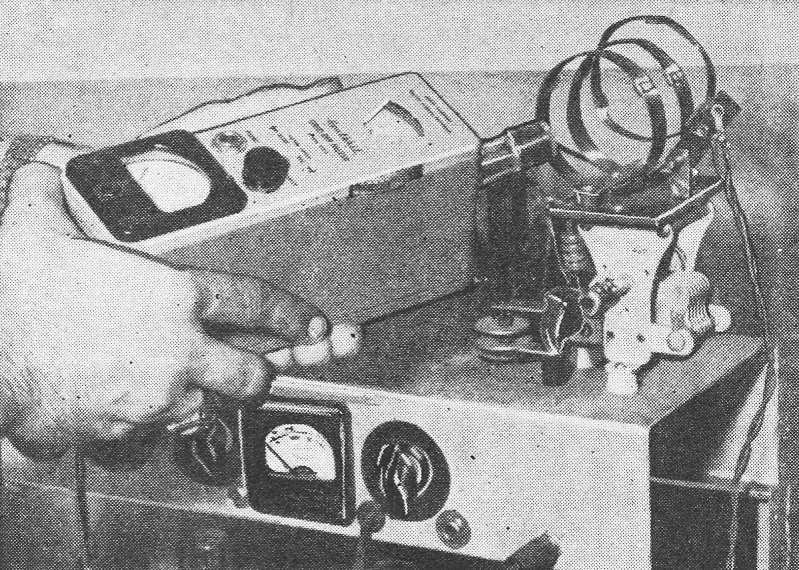
Photo illustrates method of coupling the GDO to a coil when making tests. This type of coupling is best both when the instrument is used as a grid-dip oscillator and when it is used as indicating wavemeter.
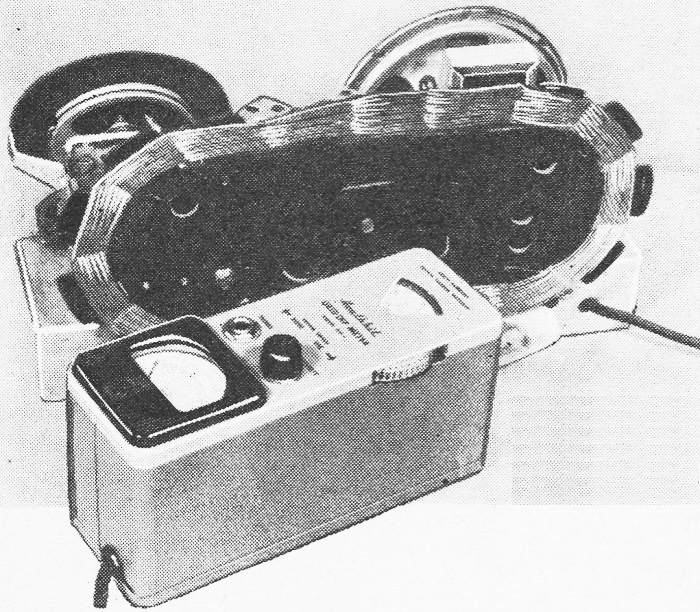
Method of coupling the GDO to an AM receiver loop during alignment is shown at the left. The individual r.f. and i.f. trimmers should be adjusted for maximum reading. On the opposite page is an alignment table for a typical a.c.- d.c. receiver, adapted for using GDO as a signal generator.
Alignment Instructions.
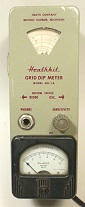
Fig. 1. A four-stage 2-meter transmitter. By setting the GDO to each of the frequencies shown, in turn, and trying to tune the particular transmitter circuit so that a dip is obtained, you can tell whether the circuits can be tuned to resonance at the proper frequencies. Within the past ten years, the grip-dip oscillator - or GDO, as it is sometimes called - has enjoyed a new surge of popularity. Numerous experimenters now consider the GDO as necessary in the modern ham shack or workshop as the VOM or VTVM. Grid-dip oscillators have been used in electronics laboratories for many years, but recently wide-range units in kit form became available at prices to fit the budget of the average ham or experimenter. The grid-dip oscillator is really a calibrated, wide-range, low-power r.f. oscillator coupled to an indicating device. An example of a commonly available GDO unit is shown in the photo above. Note the use of plug-in coils so that the wide frequency range - generally from about 2.0 mc. to 250 mc. - can be obtained with minimum r.f. losses, and so that the GDO can be easily coupled to the circuit under test. When the oscillator grid circuit is coupled to an external resonant circuit and the oscillator is tuned to the frequency of the external circuit, power will be absorbed from the oscillator and the grid current will decrease. The resonant frequency of the external circuit can then be read from the calibrated dial of the grid-dip oscillator. The "sensitivity" control is used to set the initial grid current reading to approximately half-scale on the meter - so that the dip will be sharp and easily recognized, and. to allow for differences in oscillator activity on the various ranges. When the instrument is used as an indicating wavemeter, this control limits the current through the meter. Testing Circuits. There are many uses for a GDO. Suppose that you have just finished winding the coils for a receiver or converter described in Pop'tronics and want to be sure they cover the desired frequency range. Merely couple the GDO to each of the coils in turn and look for the dips in the meter reading. By tuning each external circuit over its range and checking for resonance at each end, you can quickly determine whether the coils have the desired tuning range. Almost any resonant circuit can be checked just as easily. One important point in connection with this type of testing is that it is not necessary to apply power to the circuit under test. The only power required is for operating the GDO. Here is another example of the kind of tests you can make with the GDO. In a ham transmitter having frequency multiplier stages, you must be sure that the individual stages are tuned to the proper frequencies. Consider the four-stage 2-meter transmitter shown in Fig. 1. The plate circuit of the oscillator must be tuned to 16 mc., the plate circuit of the first tripler to 48 mc., the plate circuit of the second tripler to 144 mc., and the plate circuit of the final stage to 144 mc. By setting the GDO to each of these frequencies in turn and trying to tune the particular transmitter circuit so that a dip is obtained, you can tell whether the circuits can be tuned to resonance at the proper frequencies. This type of testing is particularly useful in preventing damage to expensive transmitting tubes in case one of the plate circuits cannot be adjusted to resonance. This basic testing method can be used in any receiver or transmitter containing a tuned circuit. The ability to reach resonance of the tuning range of the circuit can be checked very quickly. Everyone who displays any interest in radio has had a neighbor or friend come by, at one time or another, dragging his little table-model radio and explaining: "It just stopped suddenly. I took the back off to reach the tubes and saw some loose screws, so I tightened them. One tube was bad and I replaced it - but the set doesn't play now." Obviously, alignment is in order. Many experimenters hesitate to undertake such a job because they do not have a commercial signal generator. With a GDO, however, they have a signal generator and quickly can realign the receiver, although it is still generally best to obtain complete alignment data beforehand. This is included with the service information which can be purchased from many radio parts jobbers. Aligning Receivers. This table will be used as an example in the following discussion. Incidentally, this alignment procedure is standard for sets of this type and can be used if it is inconvenient or impossible to buy the service information for a particular brand of receiver. Since grid dip oscillators do not have a provision for modulating the output signal, some indicating device must be connected to the receiver during alignment. A sensitive d.c. voltmeter (20,000 ohms per volt, on VTVM) connected across the receiver volume control is the method commonly used. Connect the indicating device to the receiver circuit. Tune the set to the low-frequency end of the dial. Plug the proper coil in the GDO and set the dial to the desired i.f, The preferred method of coupling the GDO to the receiver during alignment is shown on the preceding page. Adjust the i.f. trimmers for maximum reading of the indicator. Then set the receiver dial to the 1500-kc. point and adjust the oscillator trimmer in the receiver so that a 1500-kc. signal from the GDO gives maximum indication. Finally, adjust the r.f. - or mixer trimmer - on the receiver for maximum indication. (If there is a strong local station operating between 1300 kc. and 1600 kc., you can use the signal from the station in adjusting the oscillator and r.f. trimmers in the receiver. Simply adjust the oscillator trimmer so that the signal comes in at the proper point on the dial and adjust the r.f. trimmer for maximum output from the receiver.) For output indication, connect a sensitive d.c. voltmeter across the second detector load resistor or receiver volume control, the positive meter lead going the the B- side of the control. Note: A signal from a station operating between 1300 kc. and 1600 kc. can be used in adjusting the oscillator trimmer and , the mixer trimmer. Aligning home-made receivers and converters is just as easy. Connect an indicating device to the equipment and loosely couple the GDO to the input circuit. Set the GDO to the proper frequency and go on to adjust the various stages. Most grid-dip oscillators have a switch which will convert the instrument to a wide-range indicating wavemeter or simple diode phone monitor with the addition of a pair of headphones. Checking Frequencies. Novice hams are aware that FCC regulations require all ham stations to have some means of checking their frequency other than the calibration of the crystal or VFO used in the transmitter. With the GDO set for use as an indicating wavemeter, it is ideal for frequency checking or "band spotting." Of course, the calibration of the GDO dial is not accurate enough for use in calibrating a VFO, but it will indicate whether a transmitter is operating in the band. If greater accuracy is desired, the GDO calibration can be checked against a frequency standard of known accuracy and a specially drawn calibration scale can be substituted. When the GDO is set for use as an indicating wavemeter, it can also be employed as a phone monitor to check the modulation quality of the out-put signal. Simply plug head-phones in the jack on the panel, lightly couple the GDO coil to the transmitter output, and listen while someone else uses the mike. This should provide an accurate check of your ham station phone signal. Only a few of the many uses for the valuable grid-dip oscillator have been discussed here. You will find others described in the instruction manual accompanying this versatile instrument.
Posted February 16, 2022 |
|